 RxLog Docs
Overview
Connect AI models to RxLog and use them to chat, write incident reports, and triage threats.
RxLog uses AI to do the heavy lifting across your workspace: chatting about your logs, writing up incidents, and triaging detections. Before any of that works you connect at least one AI model, then pick one as the workspace default. You bring your own model and key, so you stay in control of which provider runs and what it costs.
Adding an AI model
AI models are configured on the Integrations page under the AI Agent integration. Each model you connect is one connection, and you can have as many as you like — for example one for chat and another for triage, or one per provider.
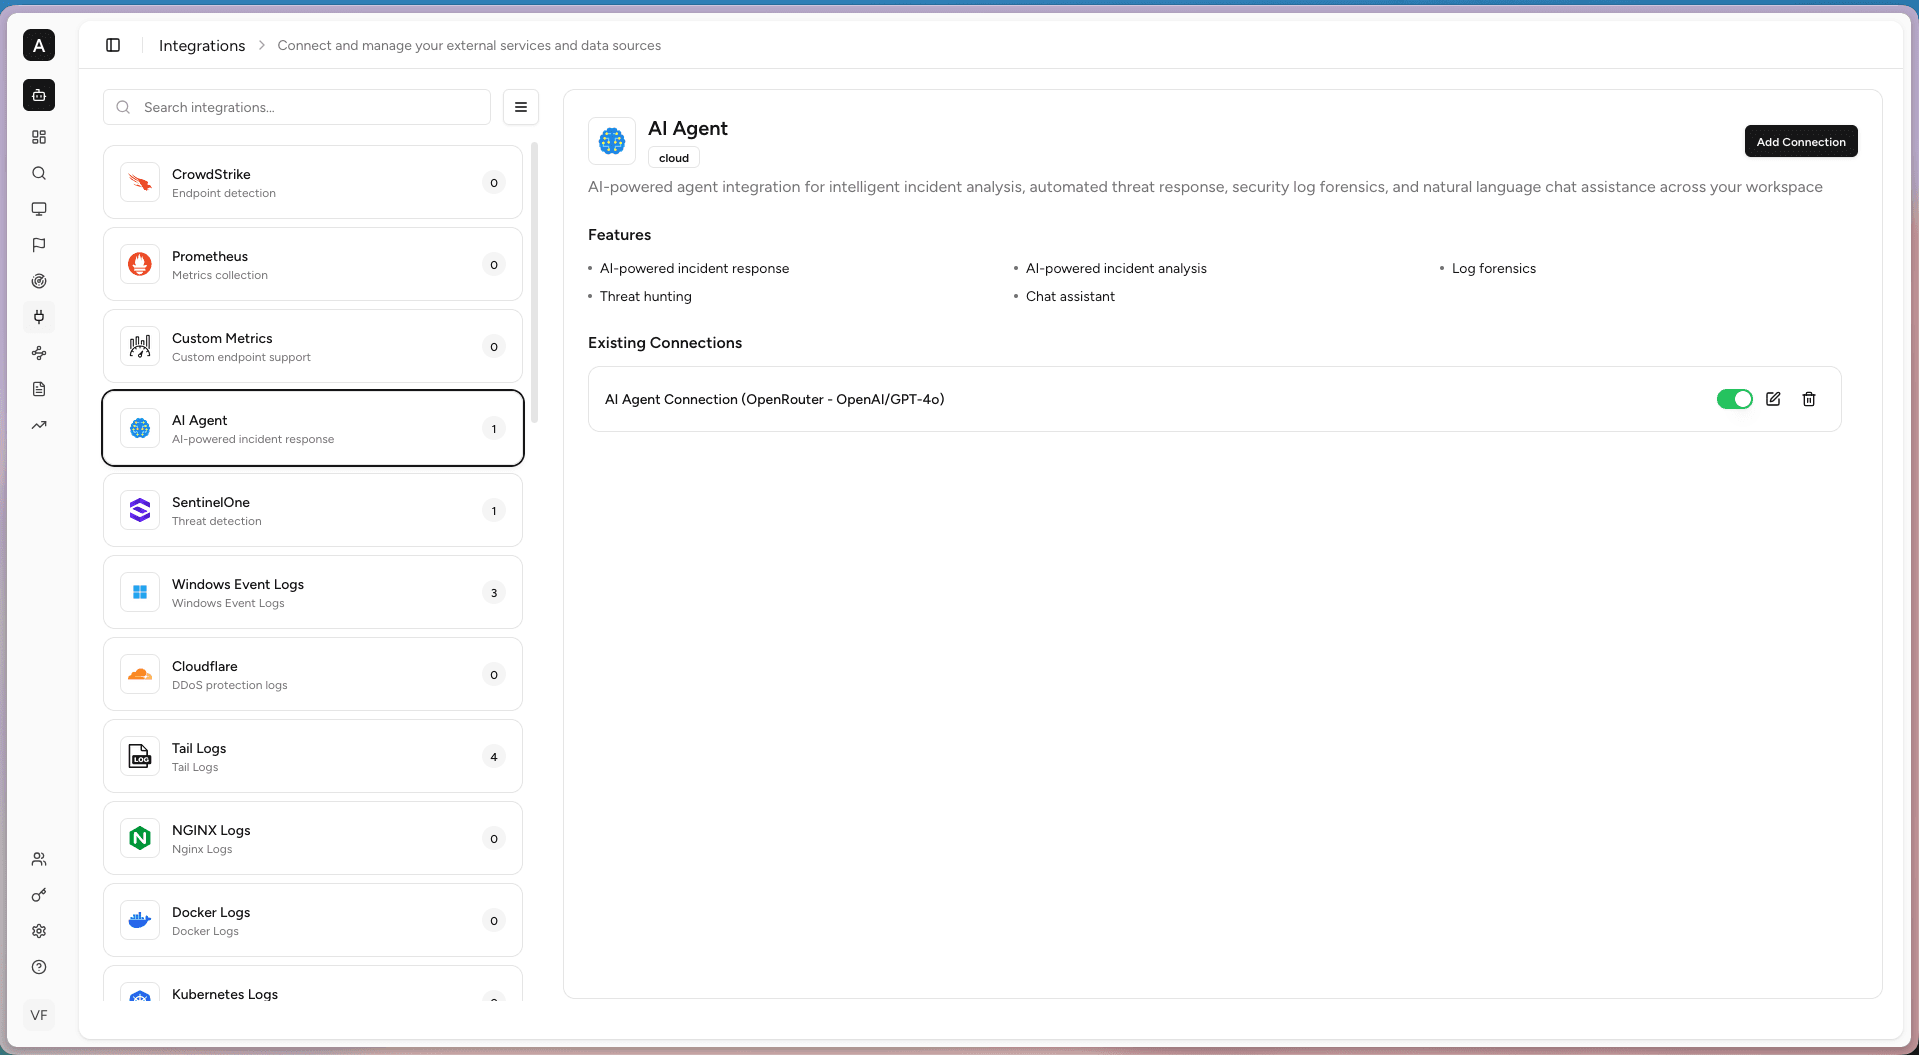
The detail panel lists the features the agent powers — incident analysis, automated threat response, log forensics, threat hunting, and the chat assistant — and shows your Existing Connections. Use the toggle to turn a connection on or off, the pencil to edit it, or the trash icon to remove it.
Click Add Connection to create one, or the pencil to edit an existing one.
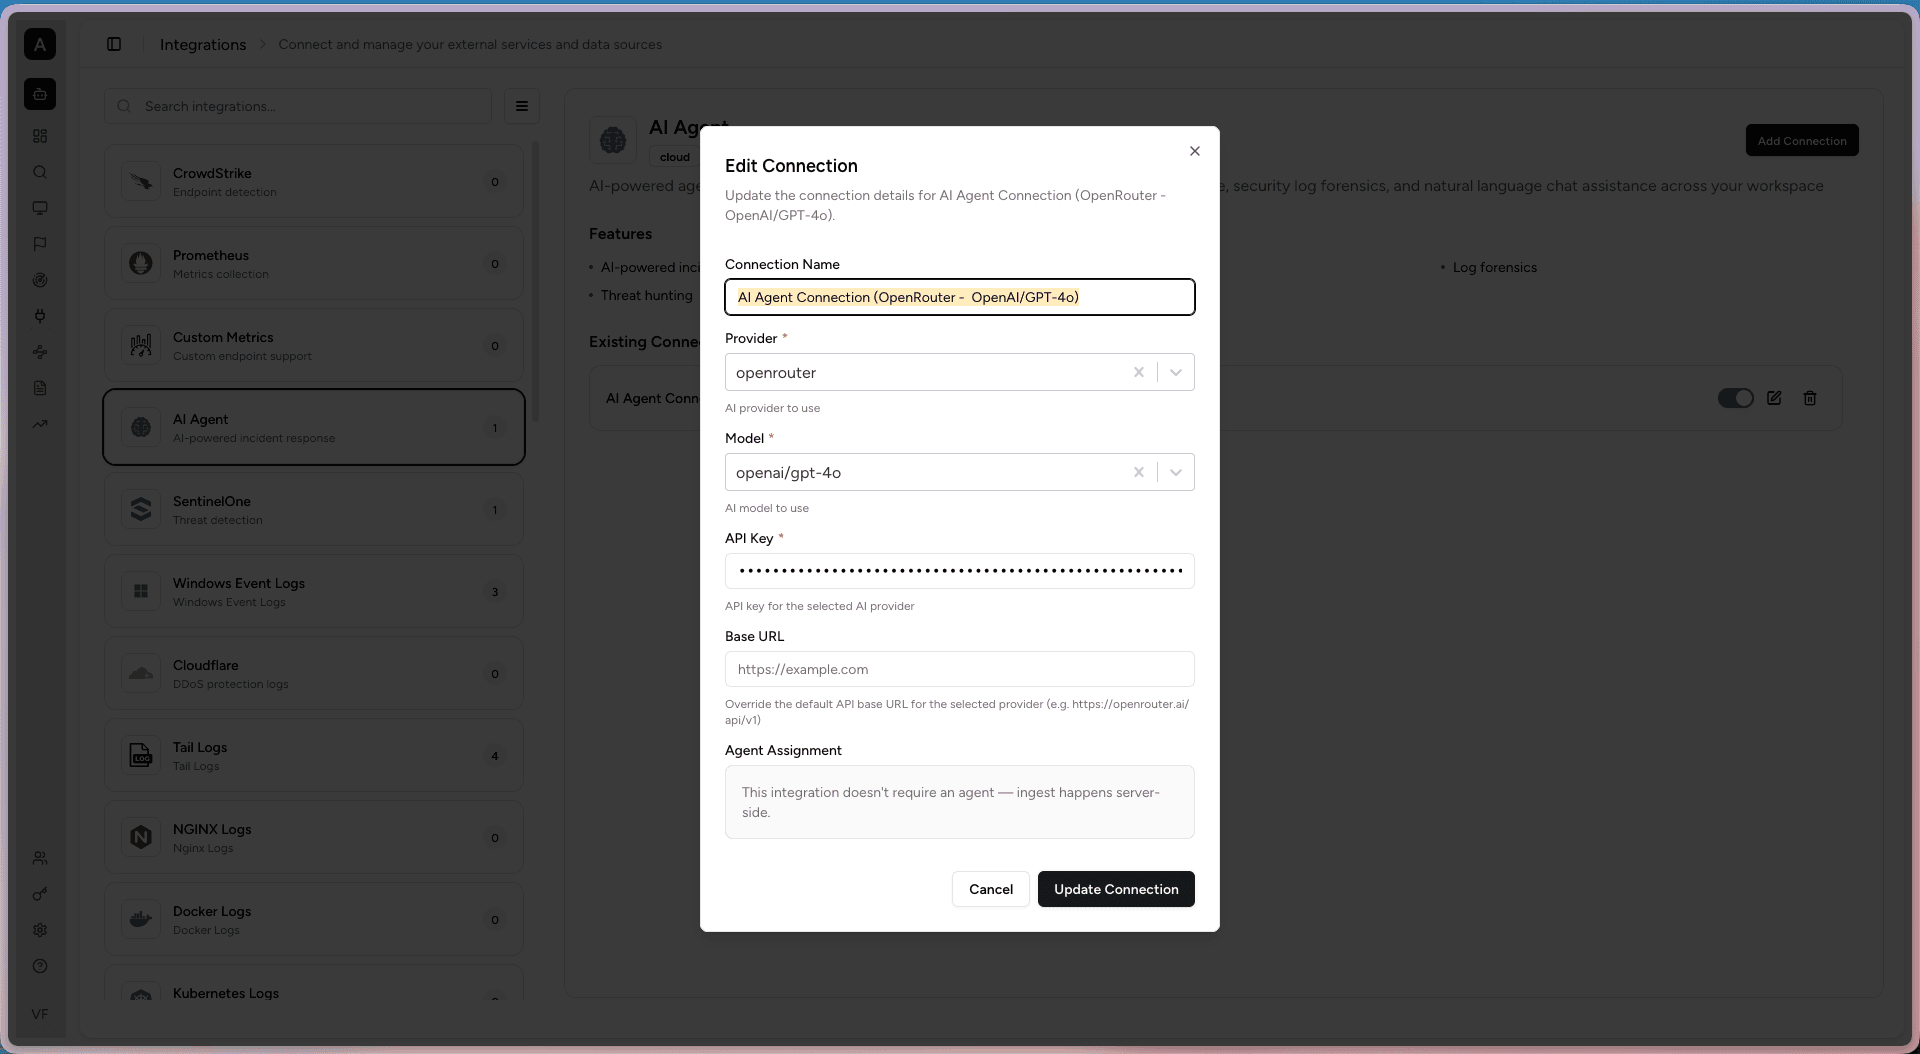
A connection has these settings:
- Connection Name. A label so you can tell connections apart.
- Provider. The AI provider to use, such as
openrouter, OpenAI, or Anthropic. - Model. The model to run, for example
openai/gpt-4o. - API Key. The key RxLog uses to authenticate with the provider.
- Base URL. Optional. Override the provider's default API URL (for example,
https://openrouter.ai/api/v1) when you use a proxy or a self-hosted endpoint.
This integration runs server-side, so it needs no agent assignment — ingest happens in the cloud once the connection is saved.
Choosing the workspace default
A connection only does work once it is set as the workspace default. Pick the default under Settings → AI Settings.
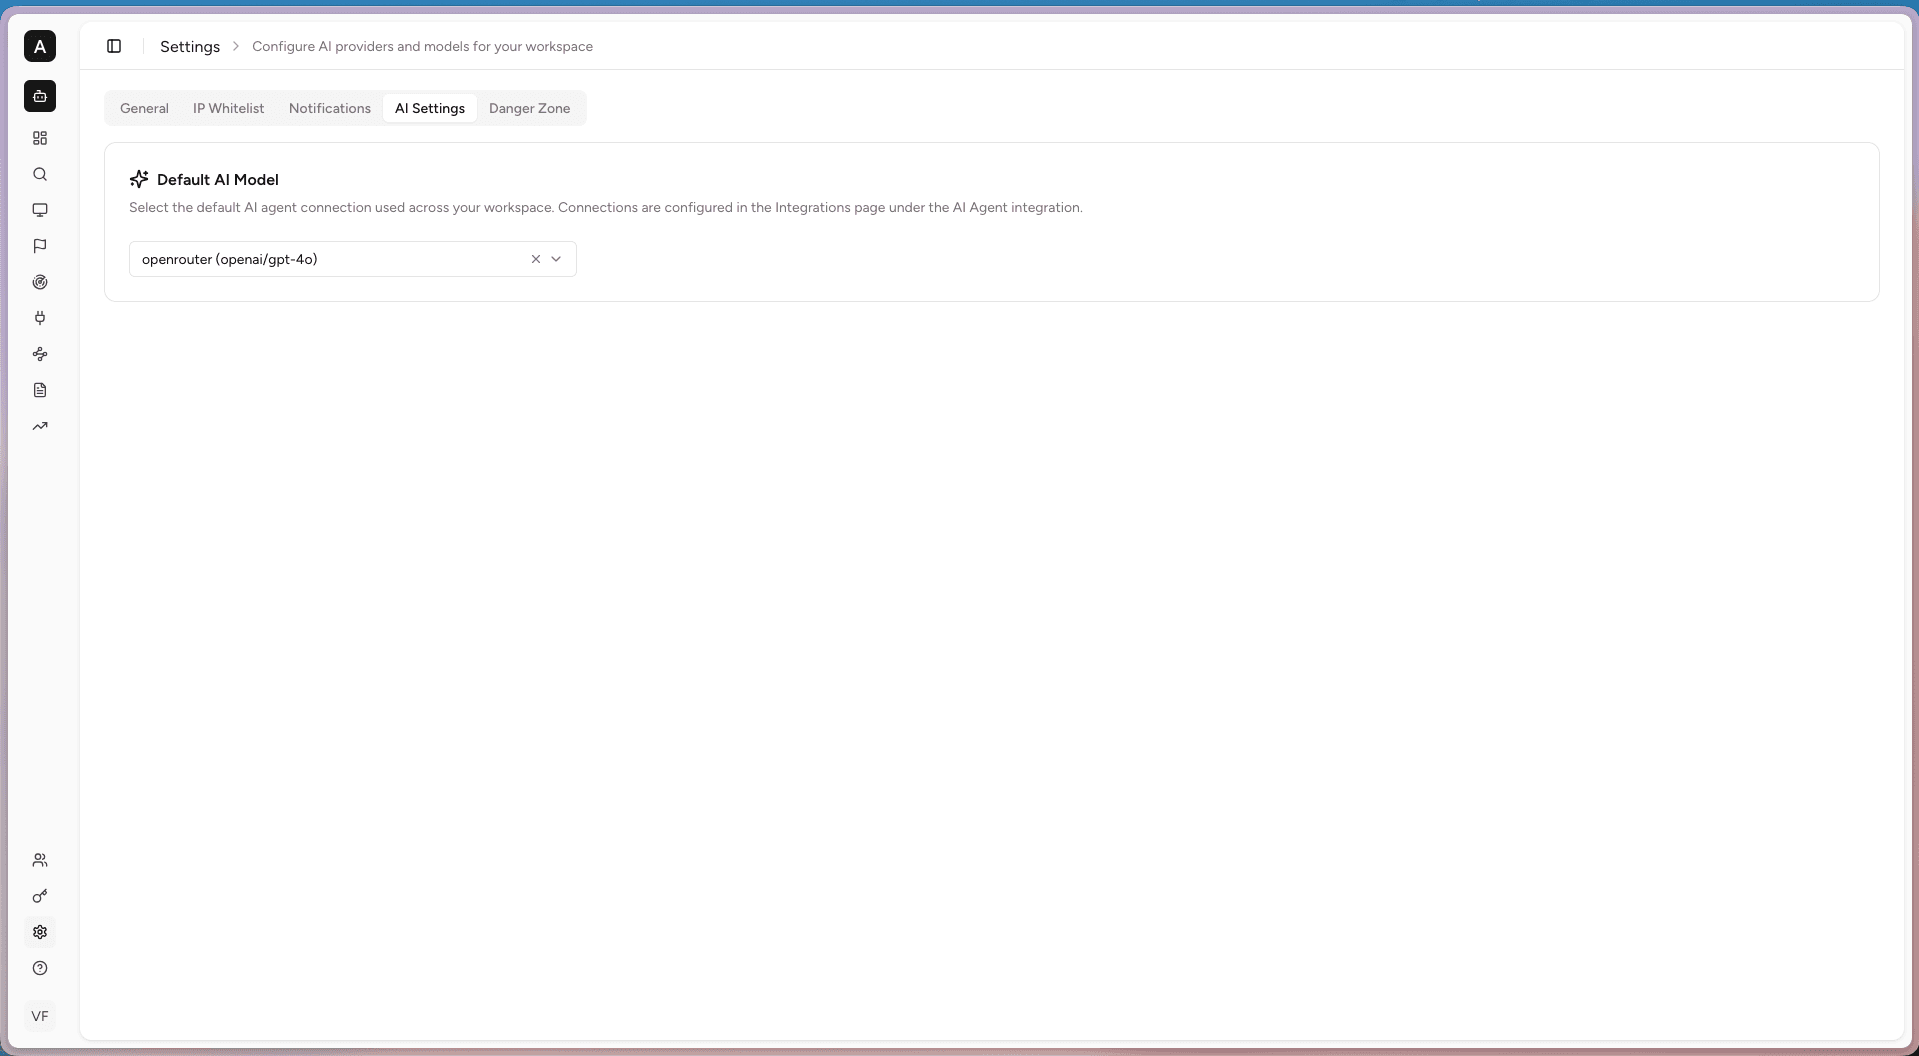
The Default AI Model selector lists every AI Agent connection you have set up. Whatever you choose here is the model used across the workspace — for chat, for incident descriptions, and for triage. Change it any time to switch providers or models for the whole workspace at once.
What the AI does
Once a default model is set, AI assistance shows up in three places.
Chat
Ask the assistant questions about your logs and incidents in plain language and get guidance back. On an incident, open Ask AI to get concrete next steps.
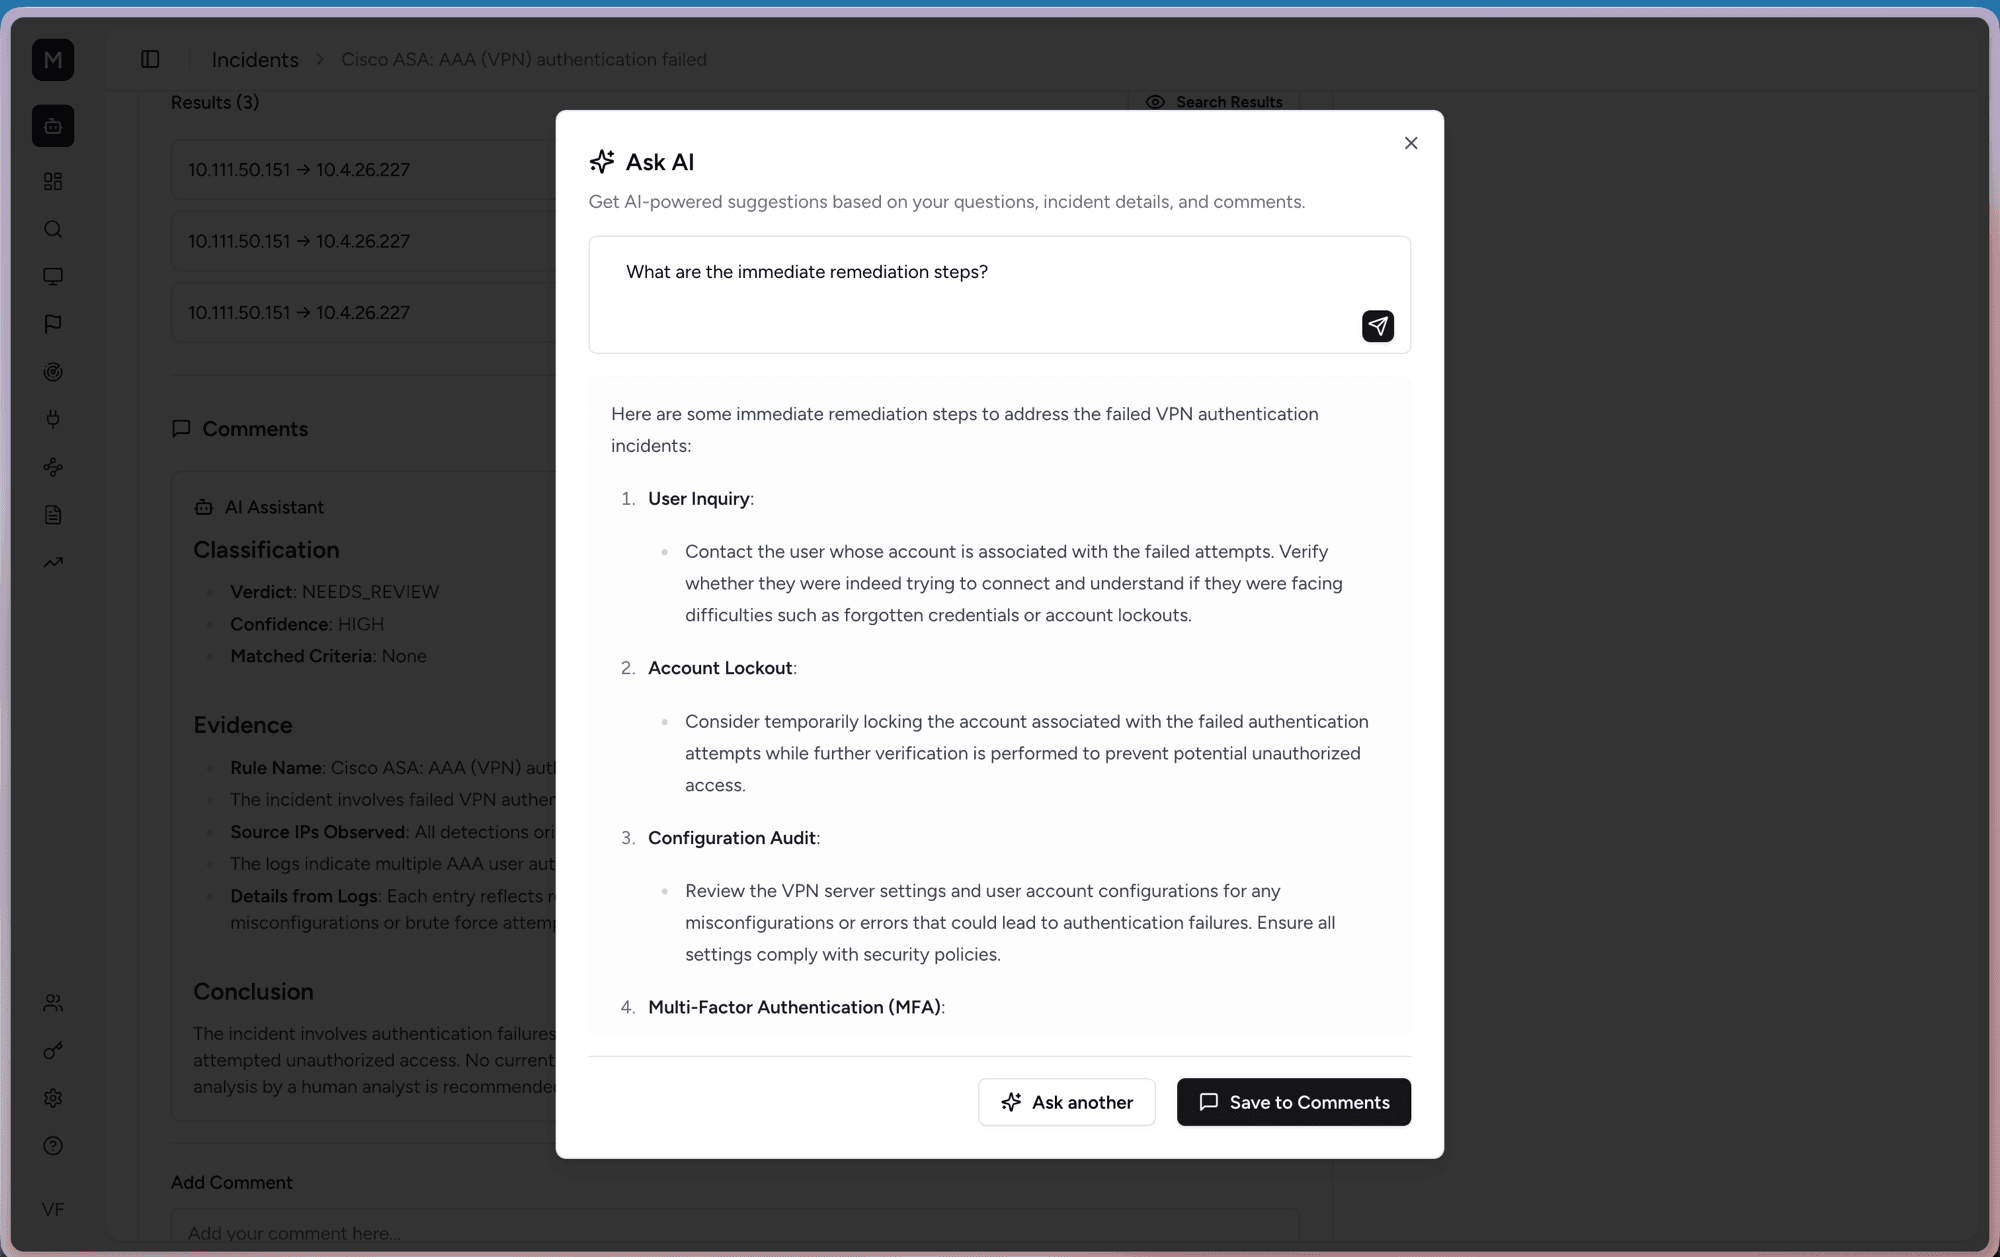
Type a question like "What are the immediate remediation steps?" and the assistant suggests actions. You can save its answer to the comments so the whole team sees it.
Incident descriptions
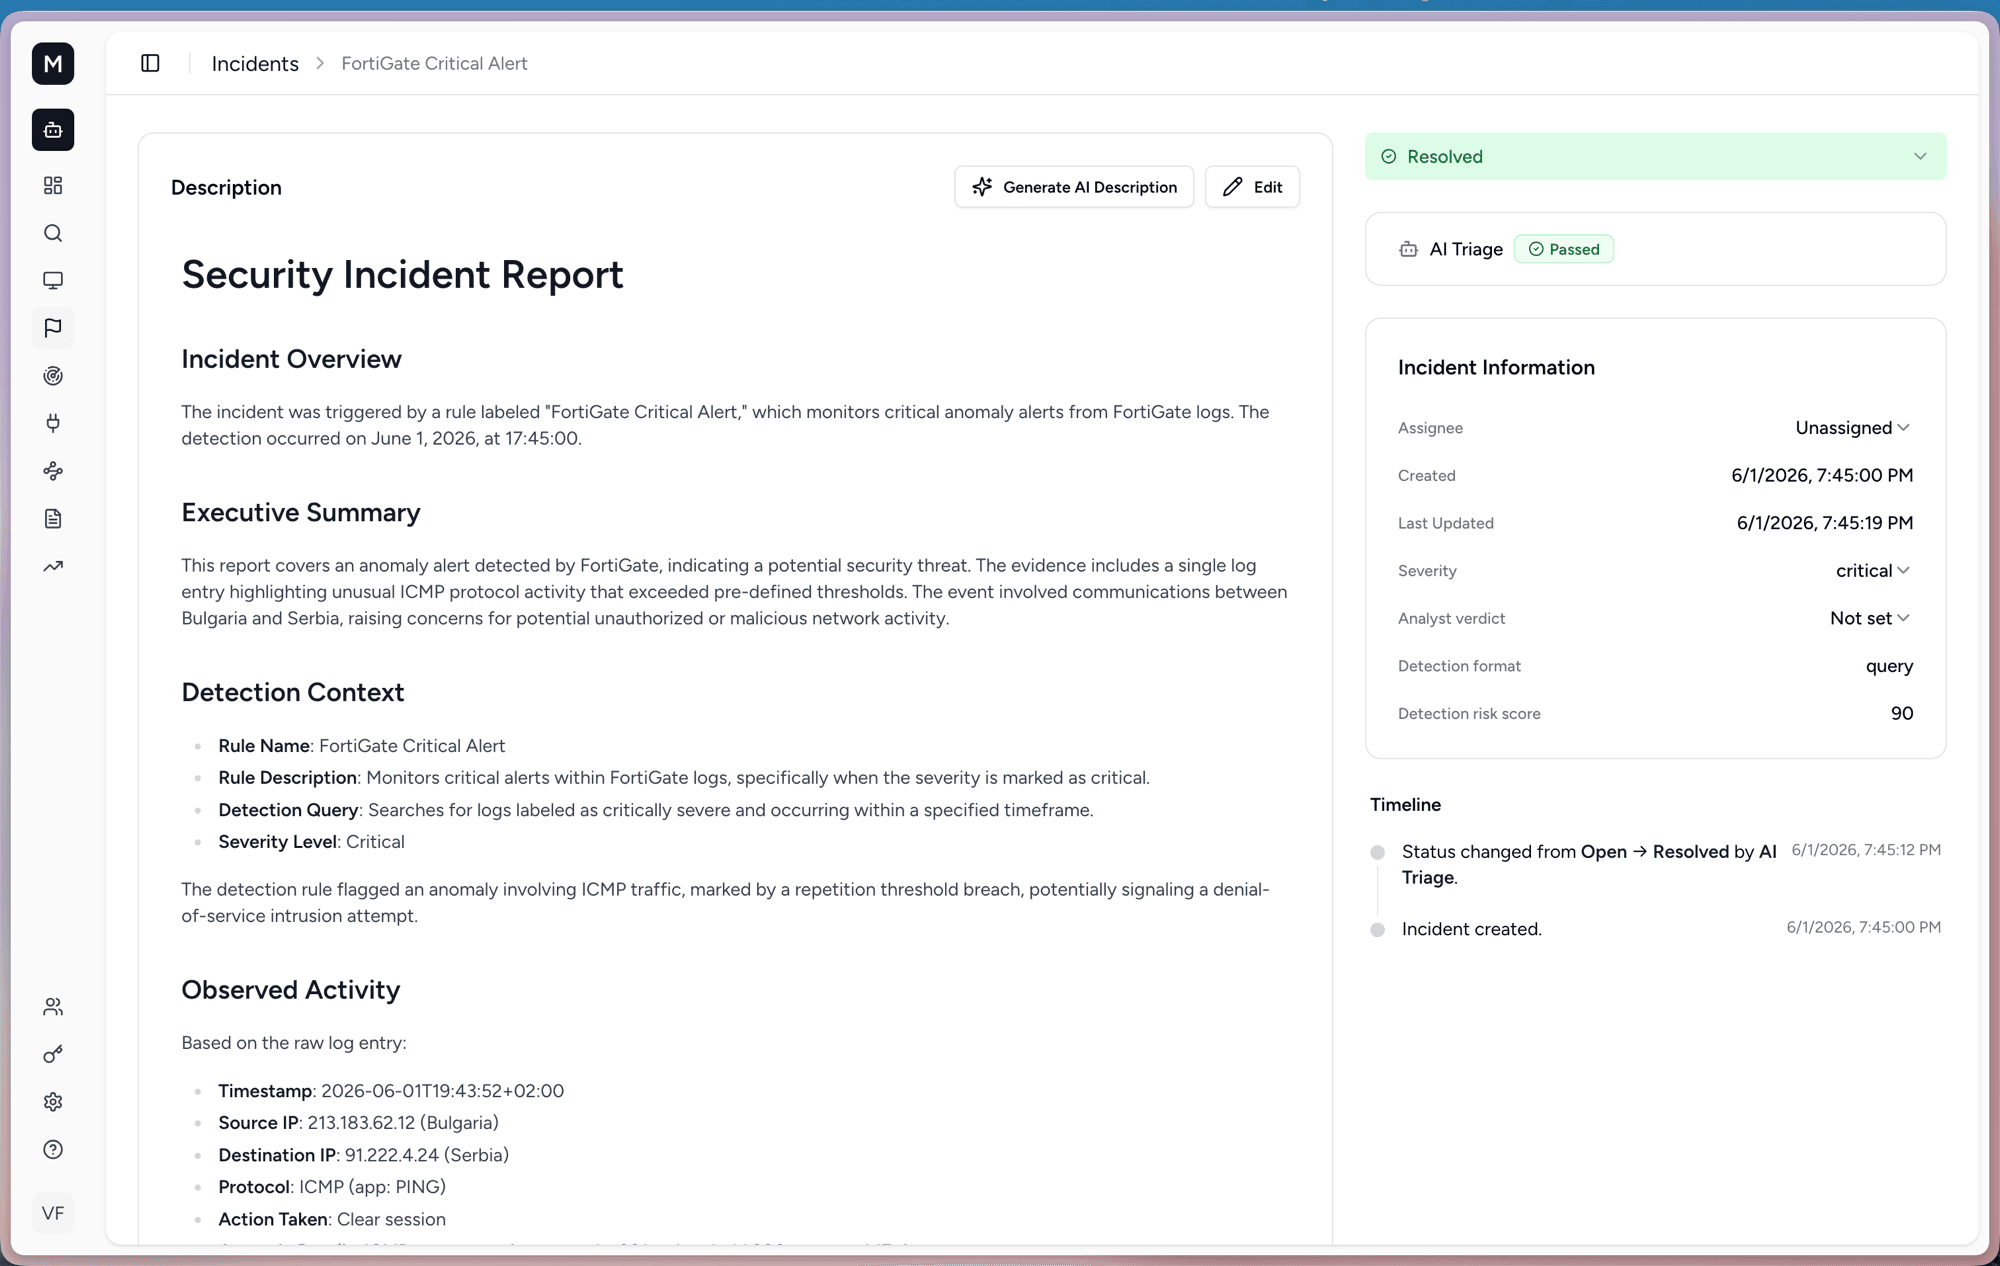
RxLog writes up an incident for you with Generate AI Description. The report covers the overview, an executive summary, the detection context, and the observed activity.
Triage
RxLog can triage an incident on its own and post a classification in the comments.
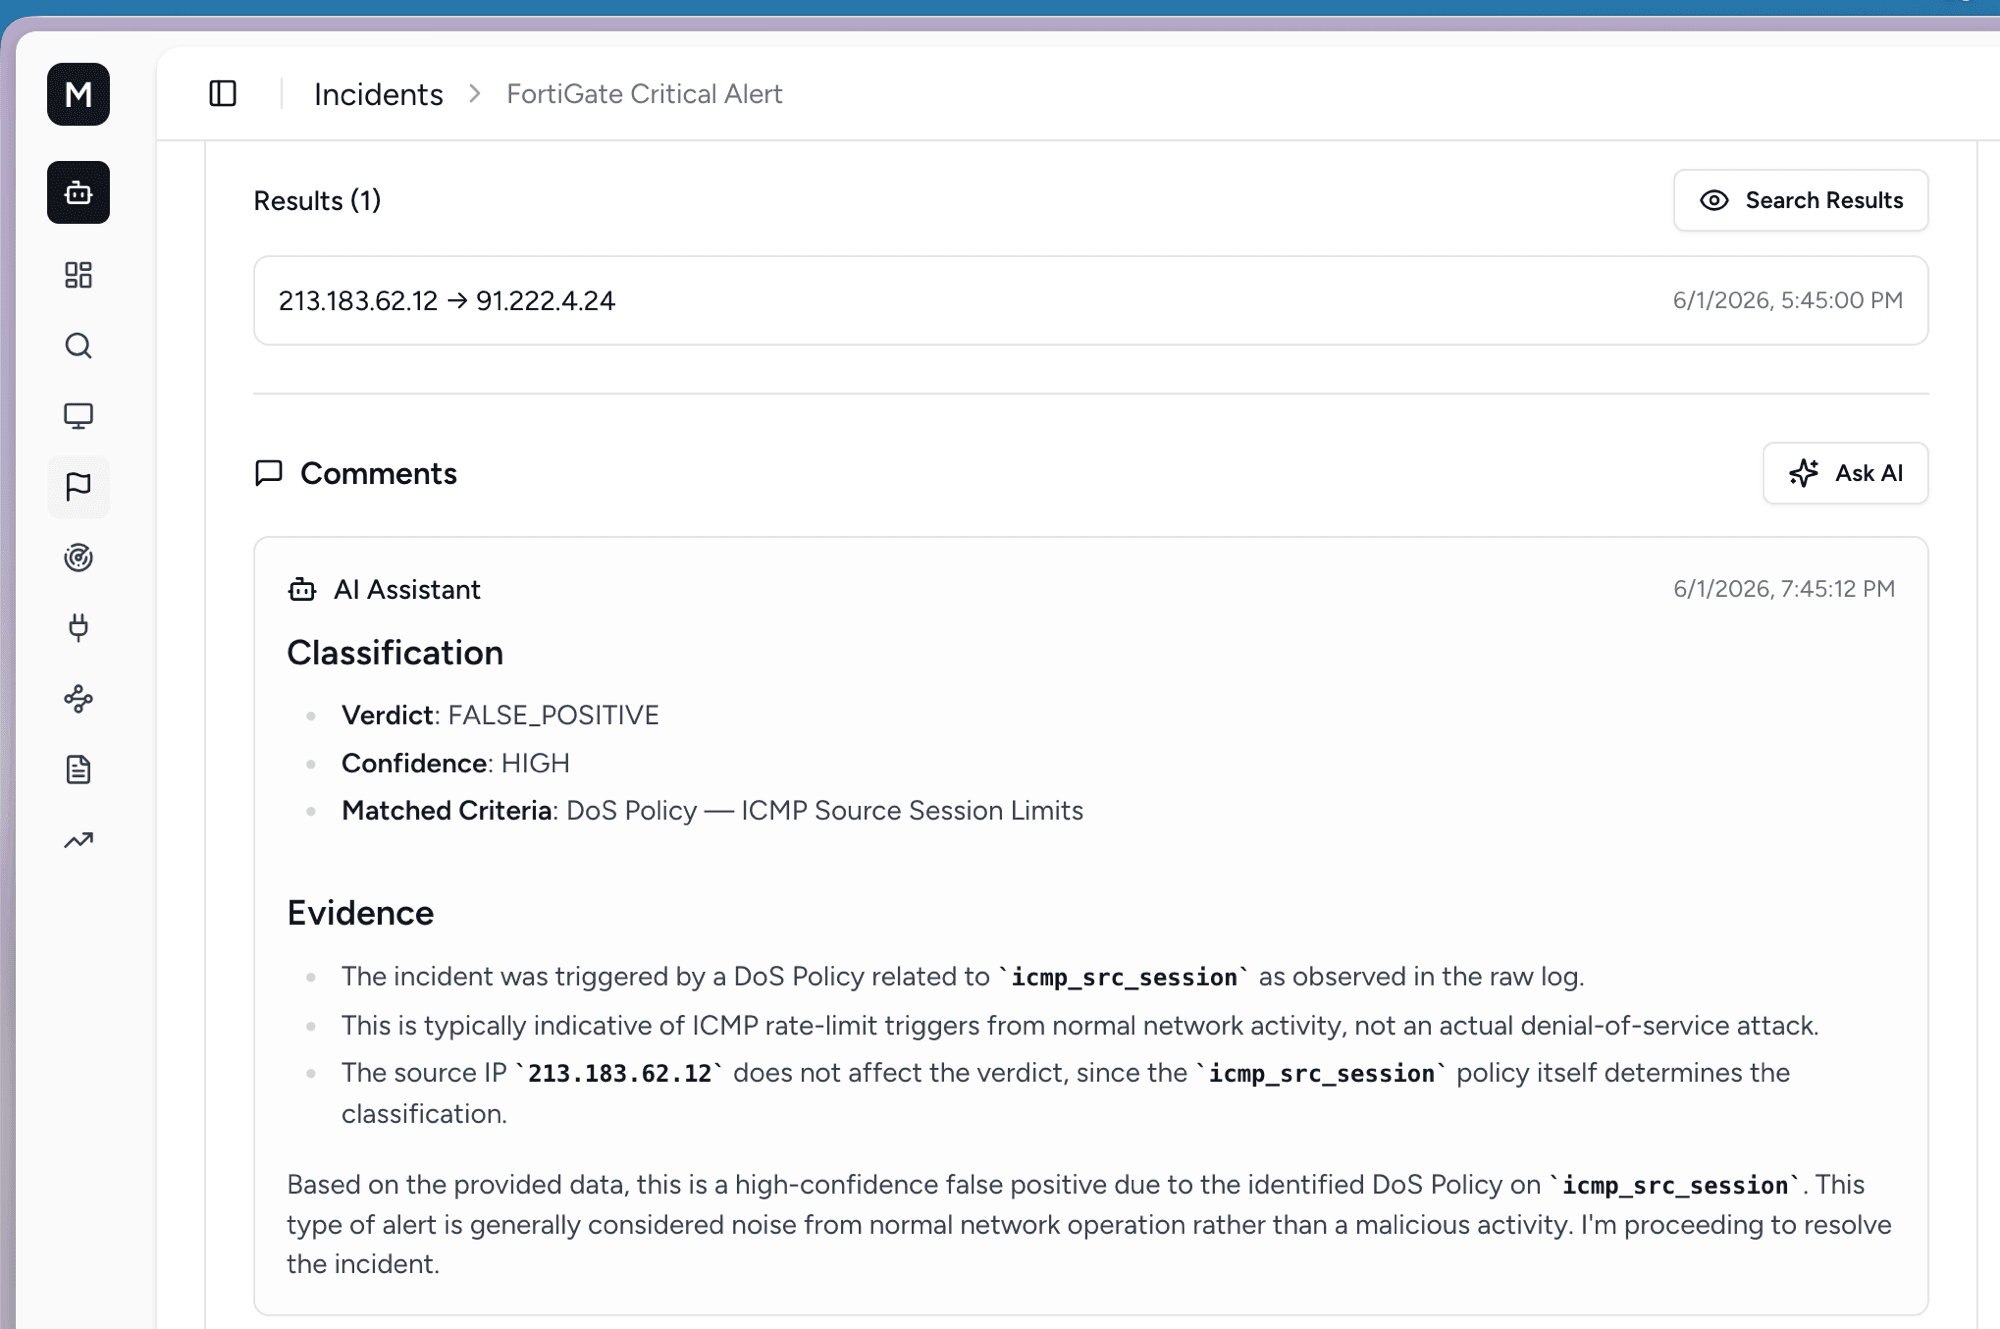
The verdict tells you whether the case is a real threat or a false positive, how confident the AI is, and the evidence behind the call. High-confidence false positives can be resolved automatically.
All three features use the model set as the workspace default. If something isn't working, check that a connection is enabled and selected under Settings → AI Settings.